Upgrading operating systems(OS) is prone to errors when doing in-place. Having a RAC-Environment doesn´t change this risk.
Even if the OS upgrade itself is successfull sometimes you encounter unforseen circumstances or bugs which in worst case results in one of your nodes beeing down until the error is resolved – if it even is resolveable in a moderate amount of time to begin with – therefor we prefer out-of-place OS upgrades.
The best way to do this while having the least impact on your current system is by adding an additional node, with the upgraded OS, to the cluster and replacing the old nodes one by one in a rolling manner. By doing this we can also get rid of old services we no longer require and forgot to remove in the past.
Since this is Oracle-RAC we can do this whole operation without having to fully shutdown the Database. This means we have zero-downtime during this upgrade.
While Oracle-RAC requires the same OS on its nodes, it is technically possible to have different OS active as long as they are binary compatible – when adding a new node to a cluster the clusterware binaries gets copied to the new node, hence the new node must be able to properly execute them.
However Oracle *does* support different OS across RAC nodes during the duration of a rolling upgrade for up to a maximum of 24h: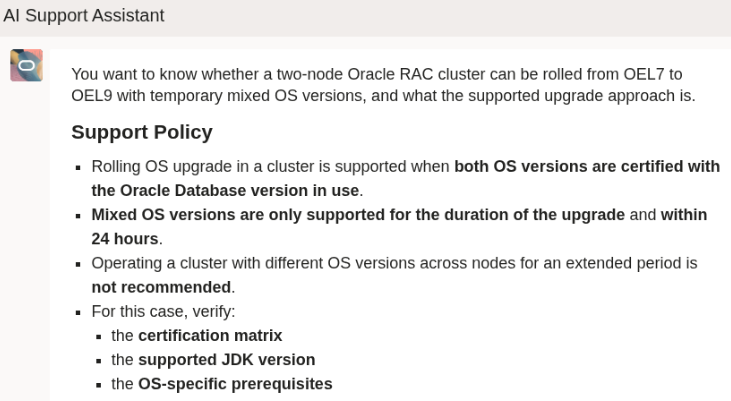
In this (way too long) blog post i will show you how to upgrade your OS from OEL7 to OEL9 inside an Oracle-RAC.
tl;dr: Setup a new temporary OEL9 node and add it to the cluster. Remove one existing OEL7 node, resetup to OEL9 and add it back to the cluster. Repeat for the second node. Remove the temporary third node from the Cluster to have it beautified at the end and keep instance_number 1 and 2.
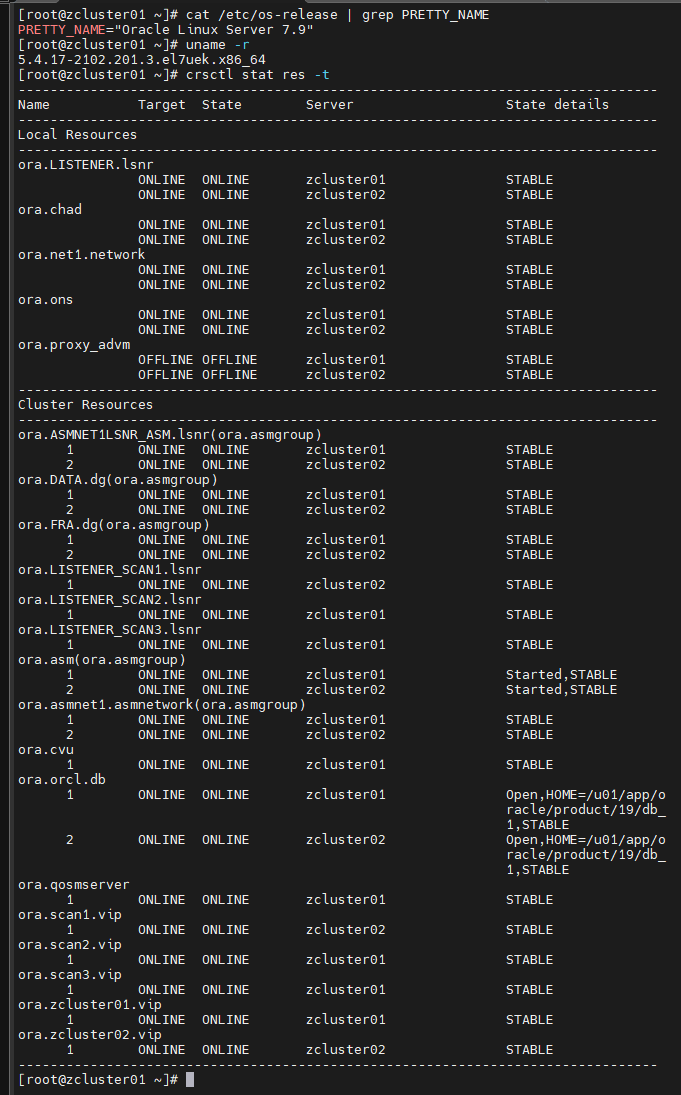
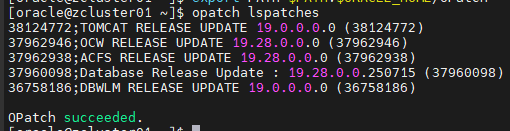
In my lab i have setup a two node (zcluster01 & zcluster02) Oracle-RAC 19c Cluster (19.28) with database „orcl“, running on OEL7 with the newest Updates and Kernel:
And also have a OEL9 host (zcluster03) setup and prepared for Oracle installations:

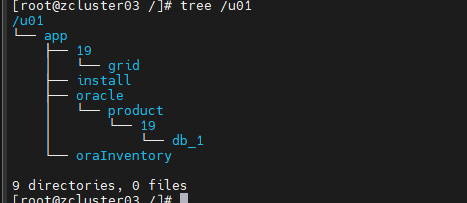
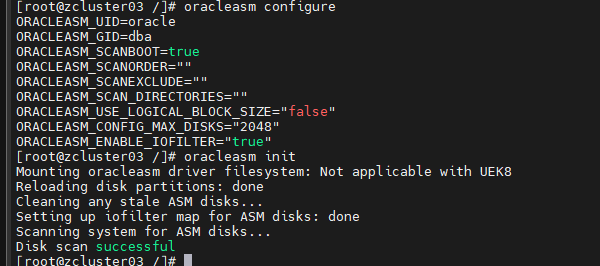
By installing oracle-database-preinstall-19c we don´t need to manually setup users/groups and Parameters on our system. If your Setup differs from the default, make sure to have all sysctl configs and limits applied on the new host aswell.
Note: If you have any 3rd party software, or other services on your current nodes you want to make sure to have them setup aswell on the new one.
Before we continue, keep in mind to have the same names on your interfaces/connections. Oracle Clusterware binds its networks to the ifnames. OEL9 ifnames tend to differ from OEL7.
Also make sure your new node aswell as its vip-address are set up and resolveable from your DNS-Server.
If you need help in searching for some packages, i recommend using yums RepoWatch: https://yum.oracle.com/repowatch/ it will display which repos contain a given package: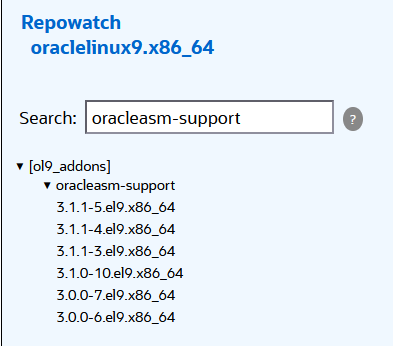
ASMlib, ASMFD, asm_diskstring:
Can be downloaded here: https://www.oracle.com/linux/downloads/linux-asmlib-v9-downloads.html
In some cases your asmlib driver is set up to have its asm_diskstring set to ‚/dev/oracleasm/disks/*‘ where all of your current ASM Disks can be found:
Note: if you are using Oracle ASM Filter Driver (ASMFD or AFD), starting with Kernel 5.14 ASMFD is no longer supported. You must migrate your system to ASMlib first before starting the upgrade.
When upgrading OS, we most likely also want to have the newest Kernel. Starting with UEKR7 mounting of /dev/oracleasm is no longer supported, which means we need to update our asm_diskstring as the current will not find any disks on our new system and the Clusterware installation will fail. This is also the case when using UEKR8.
To update the string we use dsset function of asmcmd. We need to add a discovery path for our new system while leaving the old one to not disturb our running system:
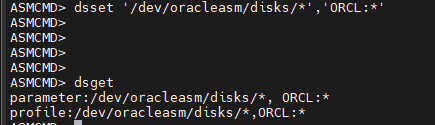
Note: According to documentation dsset will check your input for validation if it can find all of the disks for the currently mounted Diskgroups. However i don´t advise playing around, we all know oracle doesn´t have any bugs, right?
Also confirm the diskstring is changed across all your ASM instances: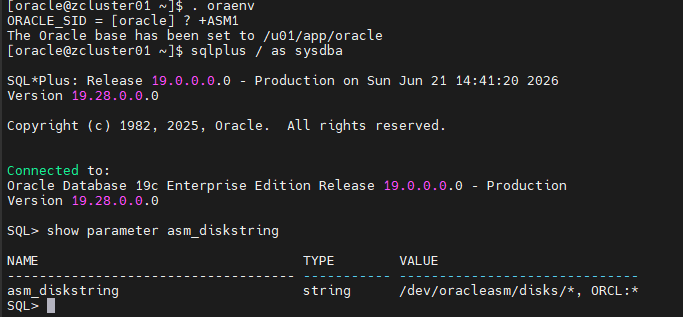
Once we confirmed the asm_diskstring is updated we can continue by setting our environment with oraenv on one of our existing nodes:
First we need to setup passwordless SSH-connectivity for our oracle user between all of our nodes. To keep it simple, i have setup one private and public key and shared these across all my nodes in my lab.
If you wish to have seperates pairs, you need to create them (for examaple using)using ssh-keygen and add the .pub key to authorized_keys files on the remaining nodes. To keep it simple, add all 3 pub keys to one authorized_keys file and copy this file over to the other nodes. Do not add a passphrase for your key.
Also make sure to ssh once manually across all nodes to have the SSH-fingerprint added to your known_hosts file:
zcluster01 -> zcluster02 & zcluster03
zcluster02 -> zcluster01 & zcluster03
zcluster03 -> zcluster01 & zcluster02
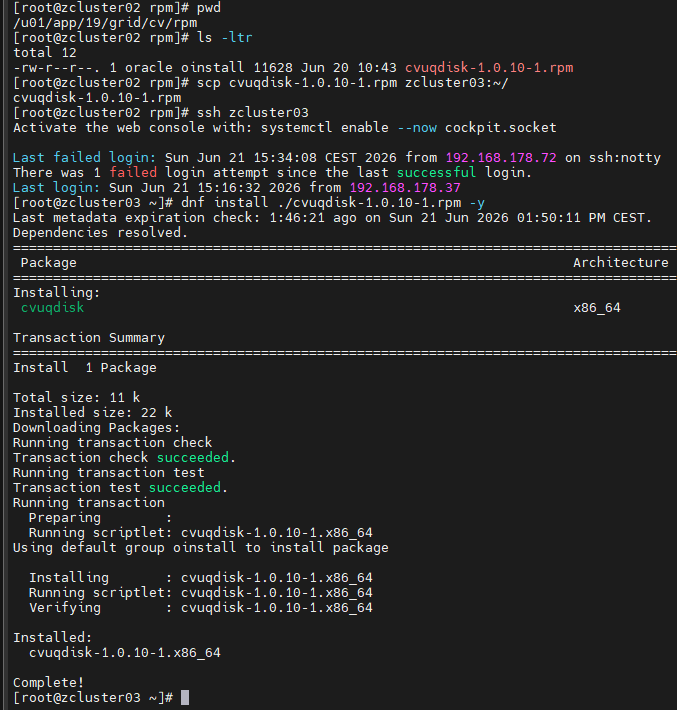
Also we need to install cvuqdisk manually on the new node, we can do this by simply copying the rpm from within our GI Oracle_home over to the new node:
If haven´t done yet, use oracleasm scandisks to instantiate your ASM Disks from other nodes, confirm if you see all ASM disks with oracleasm listdisks: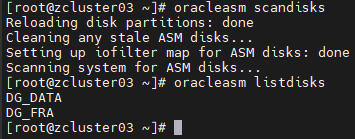
From within our $ORACLE_HOME we execute ./gridSetup.sh and click the option to „Add more nodes to the cluster“. Add the FQDN of your new node and click next
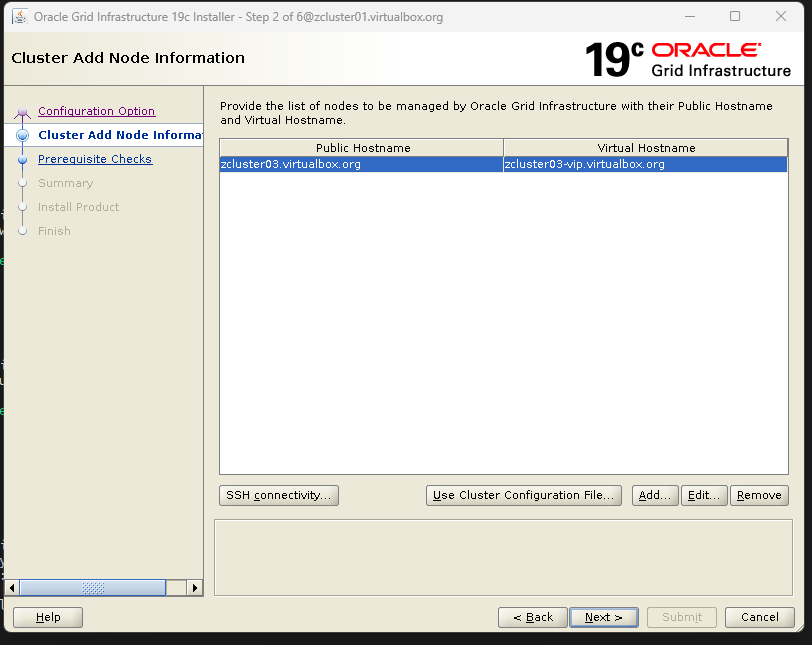
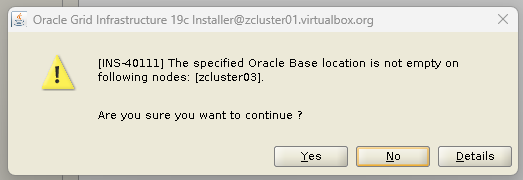
Since i´ve setup my folder-structure already i get the warning that by Oracle Base location (/u01/app/oracle) is not empty, we can ignore this warning and keep continuing
The Installer will perform some prechecks for our new node aswell as make sure the passwordless SSH-connectivity is established between all nodes.
We will get prompted a couple warnings and even Failed checks for ASM/ASMlib aswell as OS Kernel version
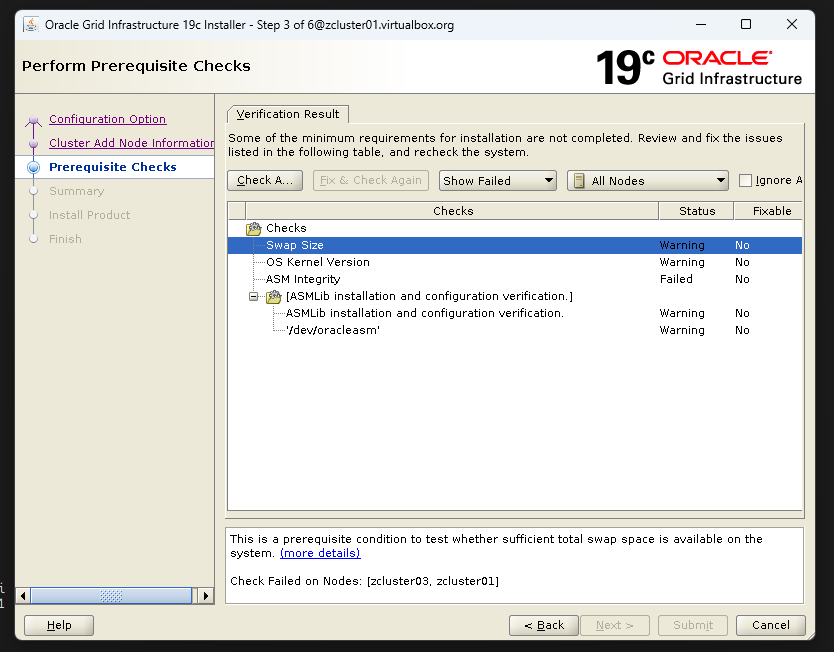
We can go on with ignoring these, as we know about /dev/oracleasm not existing in the new environment because of the new Kernel version. Regarding ASM Integrity, since we could not select any Networks for our new node, we get prompted with this error. However because our cluster is already set up and has its networks well defined within OCR, we can ignore this message. Make sure your network interfaces have the same name across all nodes!
Also my lab is small hence my swap is not according to oracle standards, I will go on and ignore this warning aswell as it has no impact on us.
By clicking next and submitting, we can start the installation of the new node:
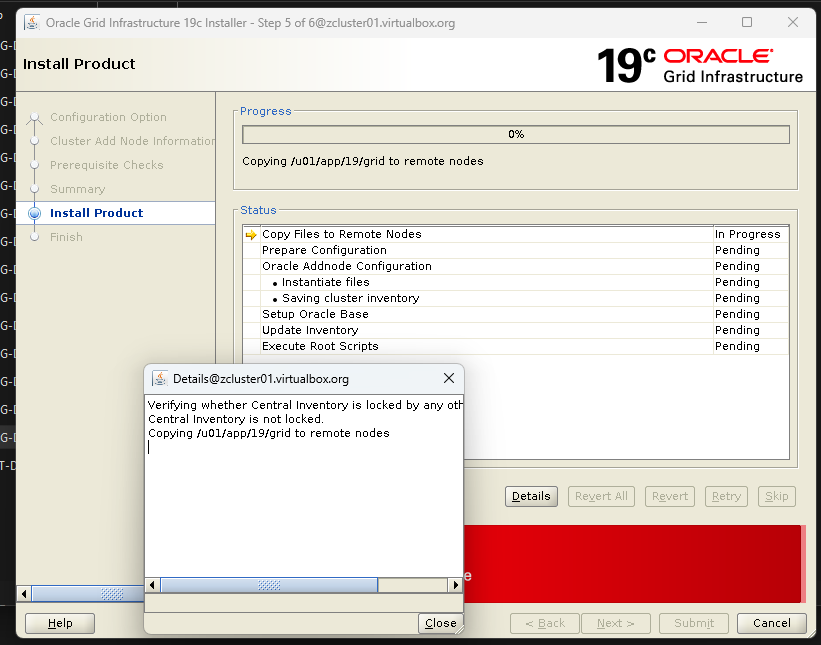
The Installer will copy over all files aswell as setup everything aswell as in the existing cluster and the new node.
Note: If you setup manually make sure to have the same patchlevel installed on all nodes.
At the end you will be prompted to execute $ORACLE_BASE/oraInventory/orainstRoot.sh and $ORACLE_HOME/root.sh as the root user.
During root.sh the clusterware is brought up as you can see in its output.
Once done, your setup is finished and the new node is added to our cluster.
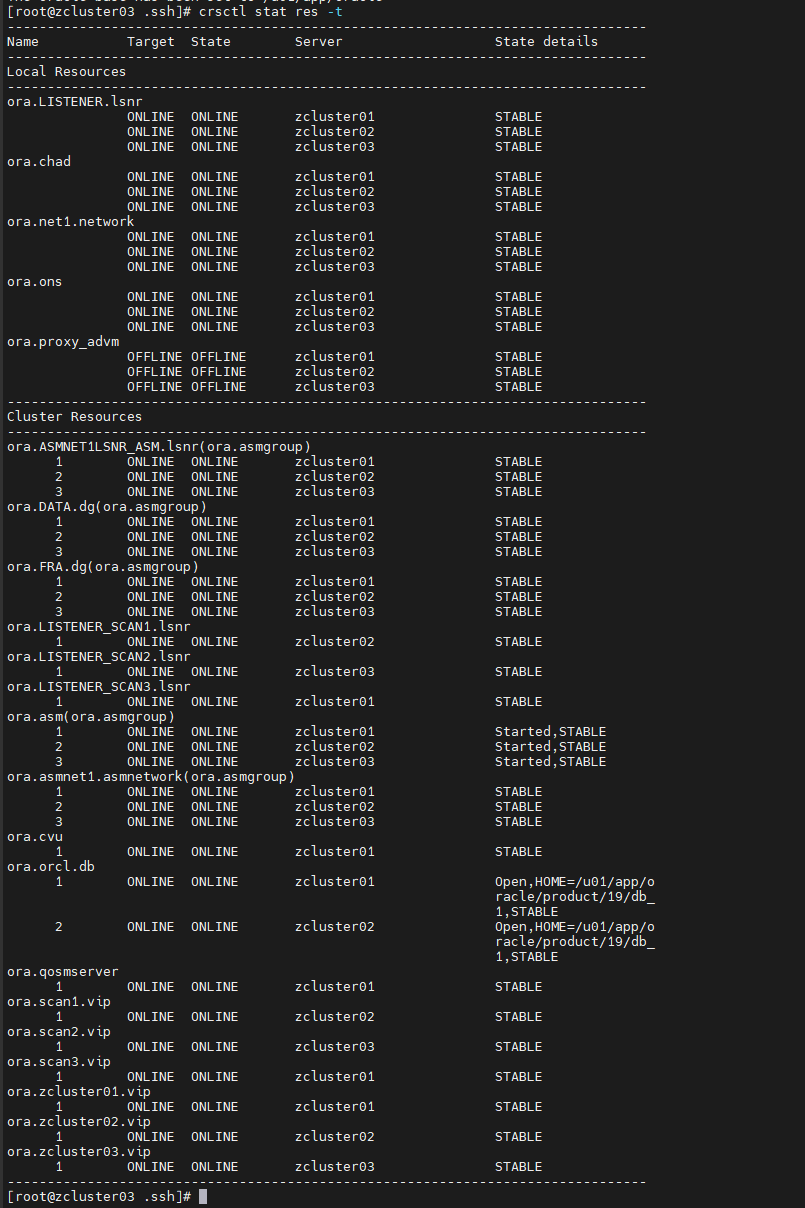
Note: Don´t forget to update your /etc/oratab on the new node.
Now we have Part 1/2 done. Our RAC consists now of two OEL7 and one OEL9 nodes. Now we need to setup a new instance orcl3 on our new node.
First we need to install our Oracle Database Home, we can do this either manually or via the addnode.sh located in „$ORACLE_HOME/addnode/addnode.sh“. This script is similar to adding a Node to the Clusterware and will also populate tnsnames.ora for the new node.
Note: If you setup manually make sure to have the same patchlevel installed as the other nodes.
Select the new node – zcluster03 – go through the prerequisite checks warnings and errors and submit. The Script will copy the files to the new node, at the end you again need to execute root.sh manually to finish the Setup.
After the Setup finishes it prompts you to use dbca to add the new instance. We can do this manually aswell. I like to do it manually as it´s just a few commands to execute and gives you more control over what happens.
Doing it manually requires to add the instance in the clusterware using srvctl, aswell as configure the Database to enable a third instance. I will go through it both ways.
Manually:
First we add the instance to Clusterware using srvctl:
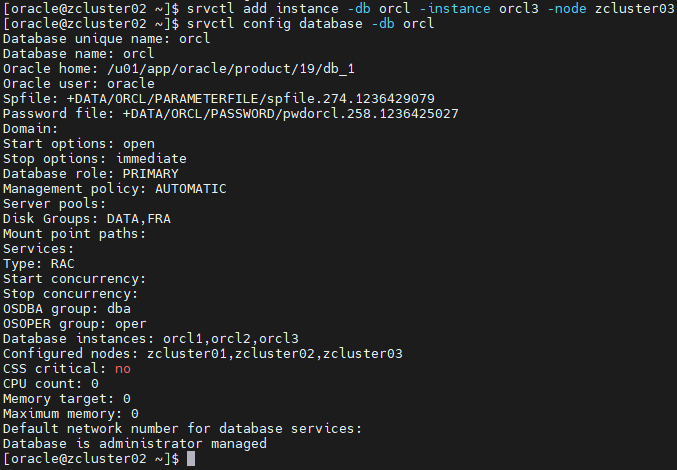
Then we sqlplus as sysdba to the database and execute following commands:
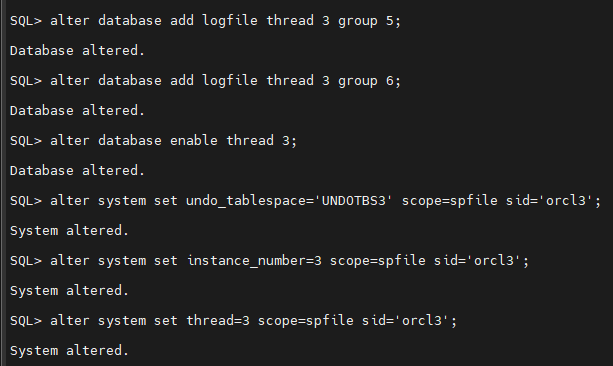
Note: don´t forget to create Undotbs3 on one of the running nodes before starting the new instance – Create undo Tablespace UNDOTBS3 datafile size 100M autoextend on maxsize unlimited;
Then we simply start the instance using srvctl:
srvctl start instance -db orcl -instance orcl3
And we are done. Our Instance orcl3 is started and ready.
Automatically via DBCA:
In DBCA we select „Oracle RAC database Instance management“, and „add an instance“.
Select your instance, enter the needed credentials and click next
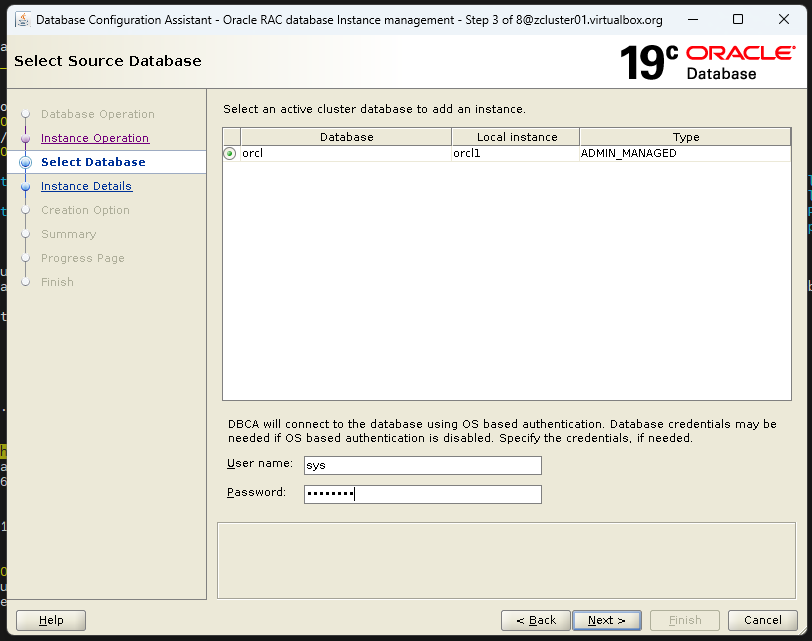
Once you click next, the installer automatically detects the new node as well as prompts with a new instance name for the node
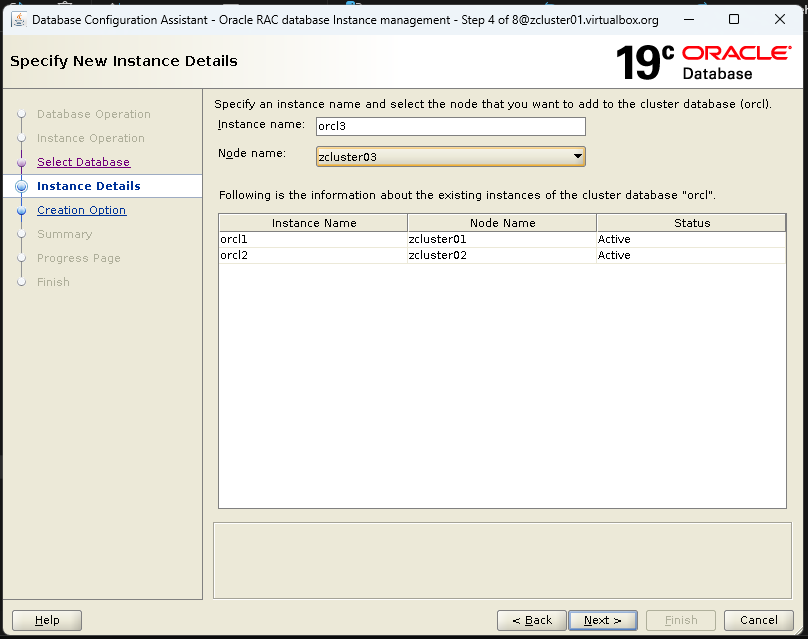
zcluster03 with orcl3 is fine for me, so i continue and click „Finish“ on the Summary page.
The installer will execute all the commands above, aswell as create the UNDOTBS3 and start the new instance. DBCA will also register the Instance in the Clusterware.
Our Cluster now has three nodes and instances running across different OS Versions:
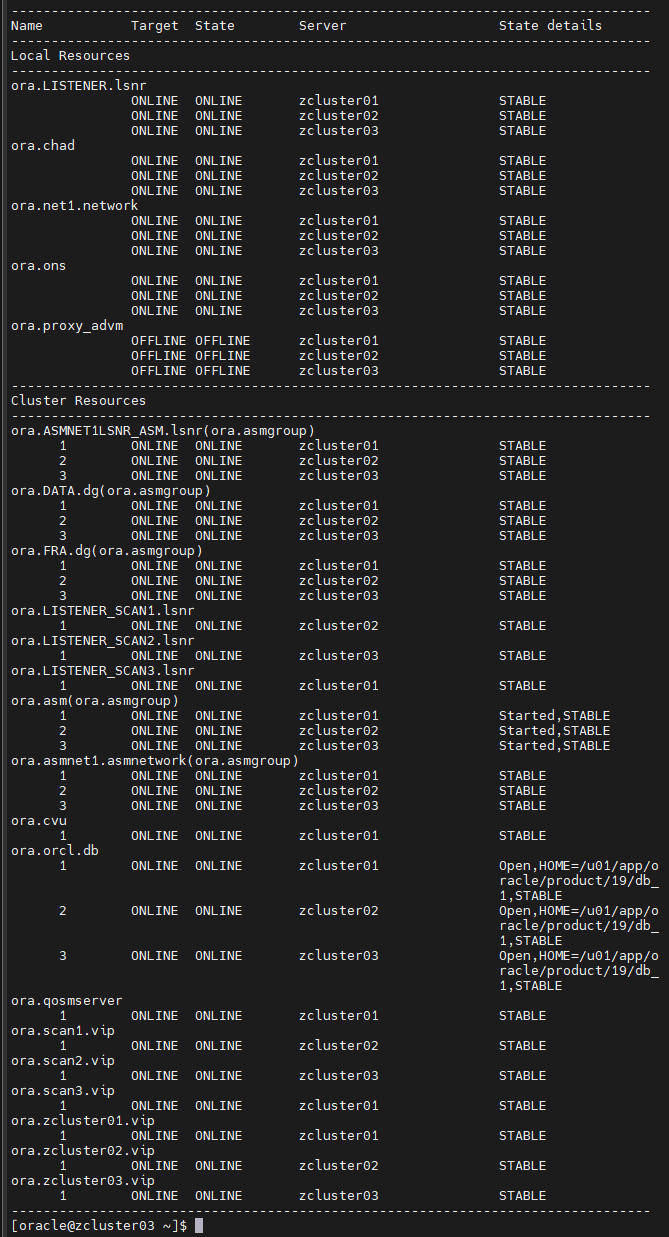
From here on we can start upgrading our existing nodes by booting them off the cluster, resetup them with OEL9 and adding them back to the cluster.
We will start with zcluster01.
First things, we want to make sure to not disturb our current users connected to orcl1. Therefore we stop the instance using transactional shutdown.
srvctl stop instance -db orcl -instance orcl1 -stopoption „TRANSACTIONAL LOCAL“
Note: Since this method waits for all current transactions to finish, this might take a couple minutes or hours depending on your environment.
Since we want to resetup our OEL7 node with the same name and settings as the current node, we don´t need to adjust the database parameters & threads, we only need to temporarily remove the instance and assotiations to zcluster01 and orcl1:
srvctl remove instance -db orcl -instance orcl1
(as root) srvctl remove vip -vip zcluster01 -f
The -f flag is needed as the vip is likely failed over on one of the other nodes.
Now we can simply shutdown the Clusterware using *crsctl stop has* or we can simply turn off zcluster01 and go on deleting the node from the cluster on one of the remaining nodes – for example zcluster03 – using:
crsctl delete node -n zcluster01
Now our cluster has completely removed zcluster01 from its inventory and we can start the OEL9 resetup.
Once OEL9 is set up, make sure to configure the node accordingly (As shown in screenshots above):
-) Setup /u01 folder structure and prerequisites for Oracle (oracle-database-preinstall-19c)
-) Setup ASMlib
-) Setup networks
-) Setup SSH-connectivity
Now we can add the Node back to the cluster as we did with zcluster03 above by using gridSetup from one of the existing Grid Homes.
./gridSetup.sh -> Add more nodes to the cluster -> enter FQDN -> ignore Oracle Base not beeing empty -> check warnings
Note: If you are prompted that zcluster-01-vip is already in use, you need to remove the ip-assotiation on the node it failed over to:
ip addr del 192.168.178.91/24 dev enp0s3
You will again be prompted to execute orainstRoot.sh from oraInventory, root.sh from Grid Home, execute them and finish the Setup.
Now we have zcluster01 as OEL9 back into our cluster 🙂
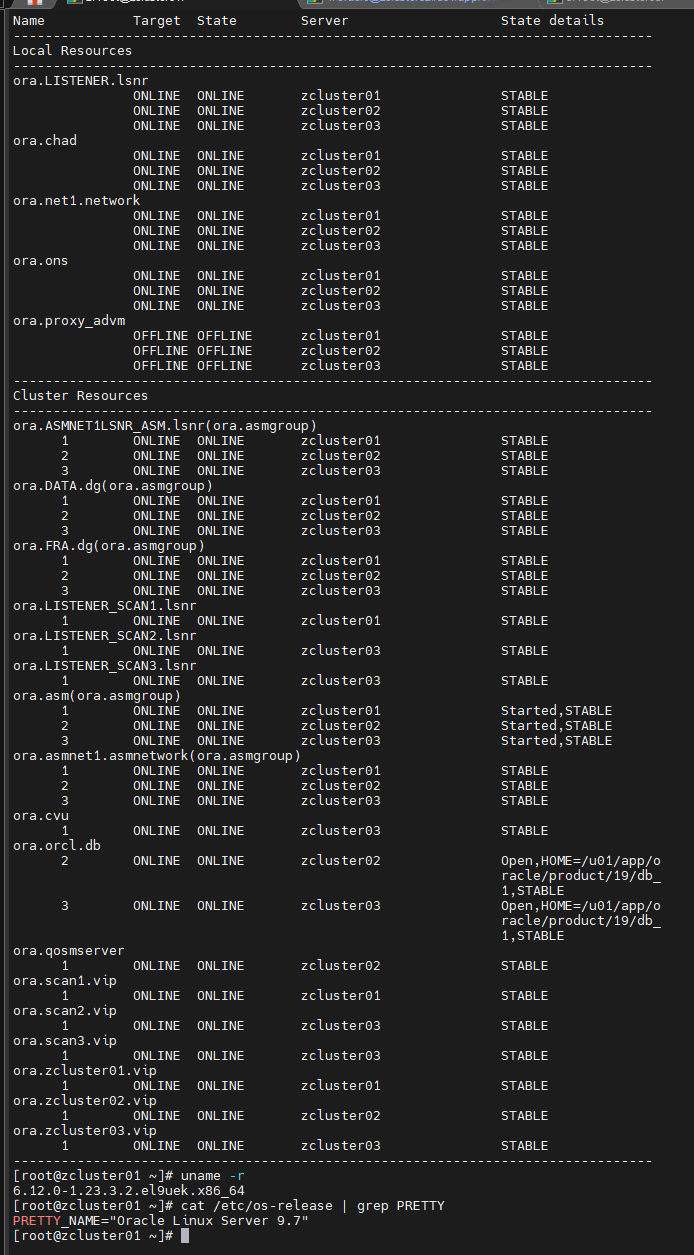
We can proceed installing the instance and database home by using addnode.sh from database oracle_home. You will be prompted to execute root.sh from database oracle_home.
Once you execute the script, database home setup is finished and we can add the instance orcl1. Since our Database and spfile is already set up, we only need two commands to setup and start the instance:
srvctl add instance -db orcl -instance orcl1 -node zcluster01
srvctl start instance -db orcl -instance orcl1
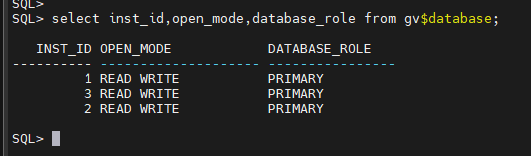
We can now repeat the same steps we did with zcluster01 for zcluster02 and have our cluster upgraded to OEL9.
In the end all we have left is to remove zcluster03 from our cluster:
-) srvctl stop instance -db orcl -instance orcl3 -stopoption „TRANSACTIONAL LOCAL“
-) dbca from remaining node database oracle home -> Oracle RAC database Instance management -> Delete an instance -> select orcl3 -> Finish – This will the config made to database and spfile aswell as delete the UNDOTBS3.
-) shutdown zcluster03
-) crsctl delete node -n zcluster03 from one of the remaining nodes
And we are done.
Technischer Hinweis/ Disclaimer
Die in diesem Beitrag beschriebenen Vorgehensweisen entsprechen unserem aktuellen fachlichen Kenntnisstand und wurden unter den dargestellten Voraussetzungen geprüft.
Da sich IT-Umgebungen hinsichtlich Versionen, Konfigurationen und Abhängigkeiten unterscheiden, können Ergebnisse abweichen. Vor dem Einsatz in Produktivsystemen sind die Schritte daher in der jeweiligen Umgebung zu prüfen und zu testen. Aktuelle Herstellerdokumentationen und Supporthinweise sind zu berücksichtigen.
Für Schäden oder Ausfälle, die durch die Übertragung auf andere Systemumgebungen entstehen, übernehmen wir keine Haftung. Die Umsetzung erfolgt in Verantwortung des jeweiligen Systembetreibers.